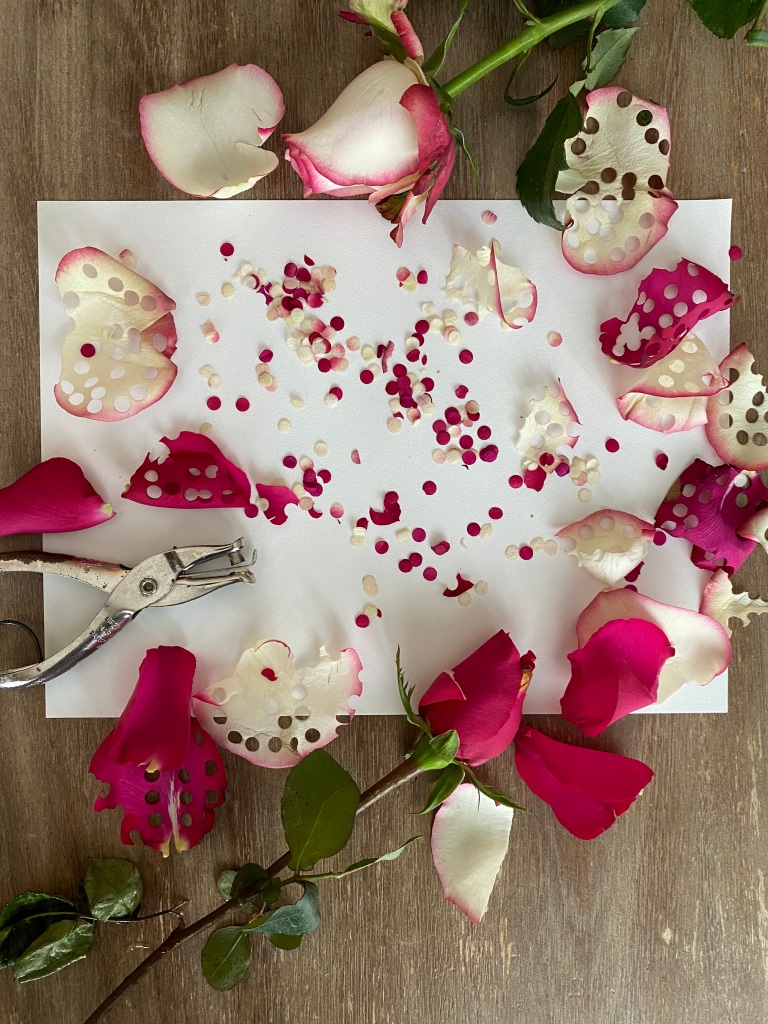
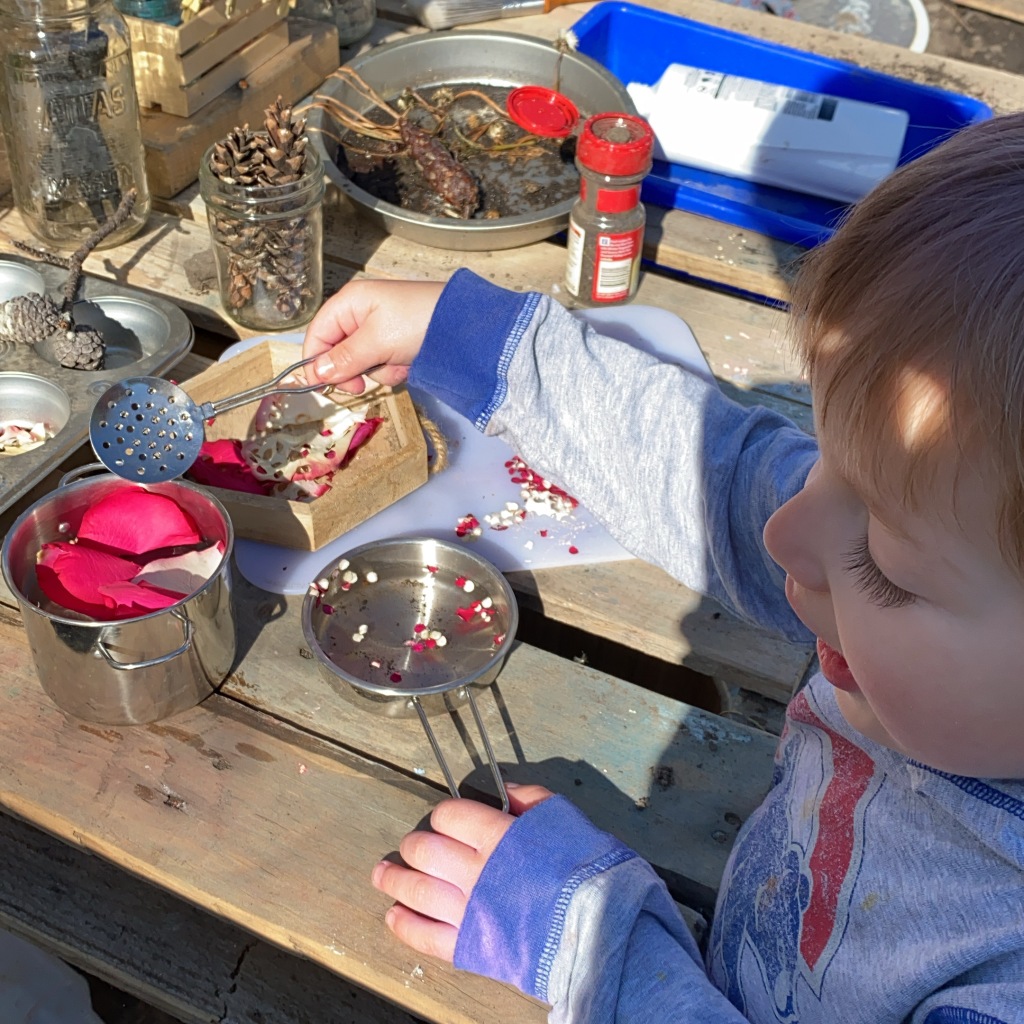
Don’t throw away those flowers just yet! Grab a hole punch and strengthen those little fine motor skills while making confetti – what you do with it is up to you! We took ours out to the mud kitchen and made potions that not only looked beautiful but smelled good too!
What you need:
Flowers
Hole Punch
What to do:
Gently remove petals from stem.
Use hole puncher to create confetti.
Save in a jar, use for an art project, or take outside to play with!
When parents ask if I know of any good “math toys” my suggestion is always the same – don’t waste your money, use what you already have! When you can incorporate numbers and math into everyday play it provides for more meaningful experiences and is more enjoyable for your child. Think about this… When given the choice would your child choose to play a math game or choose to play with one of their favorite toys?
It really is easy and often all you need is paper and a marker! Below are some examples of how simple it can be. I took three of my kids favorite “toys” and just added some numbers!
Number Towers
Noah plays with blocks every day and loves building towers. Here I grabbed some number cards from an old game and started lining them up. At first he didn’t pay much attention to me, but once I started building and counting he immediately wanted to play along!
2. Number Train!
I gathered some items from our nature collection and placed them around our train table. Then I used a hot glue gun to attach recycled cups (remember to save those recyclables!) onto the trains. Noah had a great time driving his train, identifying numerals, and counting out items!
3. Counting Water Beads
If you don’t have water beads, you could use pretty much anything that’s small: beans, noodles, fuzzy craft balls, beads, or leftover Halloween candy 😉
All you need here is a muffin pan or some small containers. Add a number and let the counting begin!
One of my favorite literacy activities is story dictations – which is simply having your child tell you a story while you write it down. It gives them a chance to become an author and shows them that their words are meaningful.
What you need: Black or dark paper, sticks, leaves, glue, “googly” eyes (or a white crayon)
What to do:
Create your forest by glueing the sticks on the paper.
Glue or draw the eyes in between the trees.
Add some crumbled leaves.
Have your child tell you a story about their picture as you write it down.
Puzzles are one of the best teaching tools because they cover so many areas of development but are so simple! Kids learn spacial awareness, shape recognition, strengthen fine motor skills, and learn problem solving skills (just to name a few!). That being said, those cute little wooden puzzles can cost a lot of money and become repetitive over time… So why not make your own?
What you need: A set of traceable objects, large paper, marker
What to do:
Set objects spaced apart on paper.
Trace each object.
Move objects to the side and your puzzle is complete!
Helping your child strengthen and develop fine motor skills is essential. From holding a spoon to tying a shoe, it all starts with getting those little fingers strong enough to hold and manipulate objects. This activity is perfect for any age because you can choose which materials work best for you and your child!
What you need: Beads (the smaller the fingers, the bigger the beads!) and strings (yarn, pipe cleaners, shoe laces, etc)
What to do:
Set out assortment of beads and give your child a string (remember to pre-knot the end).
Model how to put the beads on, you may need to help pulling the string through in the beginning.
Create! Wear! Decorate!
*Other opportunities for learning while beading include: color sorting, making patterns, counting, adding, and subtracting 🙂
One of my passions in teaching early childhood is literacy. I love reading children’s books and I truly believe as a parent the best thing you can do for your young child is to read to them EVERYDAY! Check with your local library to see if they have re-opened, several are allowing pick ups upon request. If you would like a recommendation list of age appropriate books just let me know and I can send you some titles!
*For this project we used “Where the Wild Things Are” but feel free to use any story with a monster in it 🙂
What you need: Paper plate, popsicle stick, scissors, glue, construction paper, markers (Optional: pipe cleaners, fuzzy balls, or anything from your craft supply)
What to do:
Precut two small eye holes in the paper plate.
Read “Where the Wild Things Are” (While reading make sure you are asking questions about the story such as “What do you think mischief means? Why did Max want to go back home?”)
Place materials in front of children and have them create their own monster mask.
When finished creating, tape the popsicle stick on the back of the plate.
Re-enact your favorite parts of the story wearing your masks!
My kids generally like math and math activities, but my oldest does not like writing. So to get him to practice writing his numbers I “tricked” him into playing this game 😉
What you need: Uno cards, colored blocks (or anything of different colors to count such as fruit loops or even skittles!), paper and pencil or markers
What to do:
Have your child pick two cards from the deck and place in front of them.
Identify each numeral and then count out the same number and color of blocks.
Combine two color groups and count.
Have your child write the number sentence. Remember to explain why we use + and = what they mean!
For younger children: Practice identifying the numerals and counting the corresponding number of blocks. You can also practice sorting cards and blocks by colors!
Sometimes it’s fun to just get messy and this is the perfect activity for that. The kids will never know they are strengthening their fine motor skills while learning about color mixing!
What you need: Shaving cream, food coloring, muffin tin or bowls, paintbrushes. Optional: I used baking sheets with foil on them as a painting surface – makes for easy clean up.
Ever wonder what to do with all those tiny dinosaurs (or shopkins, lego people, etc.)? We like to use them in one of my kids favorite activities. If you read my Water Walking post a log of the same science experiment tips apply: ask lots of questions, make predictions, and introduce new vocabulary words.
Before we start lets get real for a minute… You can find similar activities like this on Pinterest (which is where I found it), but regardless the “recipe” the websites give you, this experiment takes some trial and error. I’ve done it now a couple of times and below is what I find to be the best way to go about it – and believe me, unless you do this without kids it probably wont look like an egg and it probably wont be pretty! None the less, it’s still super fun for the kids.
What you need: Baking soda, water, vinegar, plastic eggs or several small containers, food coloring, small toys, eye dropper or turkey baster
*Mom hack: If you plan on doing more science experiments with your kids, buy the biggest bag of baking soda they have at the store – you’ll need it!
What to do:
Mix 3 cups baking soda with a few drops of food coloring (color won’t mix thoroughly until water is added).
Add 1/4 cup water – here’s the tricky part, I have no magic measurements here. I start with 1/4 cup and then add little bits at a time until the mixture is paste like.
Fill half of the plastic egg or small container – I used tupperware containers because our dinosaurs were too big for the eggs we had.
Push a dinosaur (or toy) inside and then add more of the baking soda mixture on top until the dinosaur is completely covered.
Place inside the freezer for several hours – or for best results over night.
Once frozen it can be a little tricky to remove the “eggs” from the containers. I suggest filling a sink or baking dish with some warm water and letting the eggs sit for a few minutes. Once you get them out, if they don’t look egg-like you can shape them by hand (if still soft) or scrape some of the baking soda off (if completely frozen).
Fill a small bowl half full with vinegar (any kind will do – I was out of white so I used apple cider and it worked fine).
Use the turkey baster or eye dropper to pour vinegar on the eggs and repeat until the dinosaurs are out!
When my children were born my great aunt gifted them both beautiful dream catchers. Liam (5) fortunately doesn’t have bad dreams often but when he does we look at it together and thankfully he gets some reassurance. So last spring when my best friend was expecting her first child, Liam suggested that we make the baby a dream catcher (yes, he is that sweet). I had never made one before, but it turned out it was super easy.
What you need: 3 sticks of similar length and width (any size will work just depends how big or small you want it to be), 3 or 4 pinecones, twine and/or yarn
What to do:
Create a triangle with the sticks.
Tie them together at the corners (I used twine for this part). I had Liam hold the sticks while I tied them tightly.
Wrap the yarn in all different directions around the triangle securing with knots when needed.
Tie one end of yarn around pine cone and then the other end around the bottom stick. Repeat with desired amount of pine cones.
Add an additional piece of yarn at the top for hanging.
It turned out so cute, I hung it up for this picture and never took it down! Rachel, if you are reading this, I owe you a dream catcher 😉